1. 起因
我的大部分代码编写已经转到vscode,只有写 OJ代码的使用的是vim(因为快). 现在我准备配置一个专用的nvim,精简一下配置.
2. lazy.nvim
这里我们使用lazy.nvim 作为我们的插件管理器,因为国内的环境,我们配置一下github下载proxy
~/.config/nvim/lua/config/lazy.lua
lazy.nvim 配置
 1-- 初始化 lazy.nvim
 2local gitproxy = "https://gh-proxy.com/"
 3local lazypath = vim.fn.stdpath("data") .. "/lazy/lazy.nvim"
 4if not (vim.uv or vim.loop).fs_stat(lazypath) then
 5  local lazyrepo = gitproxy .. "https://github.com/folke/lazy.nvim.git"
 6  local out = vim.fn.system({ "git", "clone", "--filter=blob:none", "--branch=stable", lazyrepo, lazypath })
 7  if vim.v.shell_error ~= 0 then
 8    vim.api.nvim_echo({
 9      { "Failed to clone lazy.nvim:\n", "ErrorMsg" },
10      { out,                            "WarningMsg" },
11      { "\nPress any key to exit..." },
12    }, true, {})
13    vim.fn.getchar()
14    os.exit(1)
15  end
16end
17vim.opt.rtp:prepend(lazypath)
18
19-- 在加载 lazy.nvim 之前确保设置 `mapleader` 和 `maplocalleader`,以确保映射正确。
20-- 这里也是设置其他选项 (vim.opt) 的好地方
21vim.g.mapleader = " "
22vim.g.maplocalleader = "\\"
23
24-- 设置 lazy.nvim
25require("lazy").setup({
26  -- 不自动检查插件更新
27  checker = { enabled = false },
28  -- 在这里添加你的插件配置
29  spec = {
30    -- same as: require("lazy").setup("plugins")
31    -- 从 lua/plugins 目录加载插件配置
32    { import = "plugins" }
33  },
34
35  git = {
36    log = { "-8" }, -- 显示最近8次提交
37    timeout = 120,  -- 终止超过2分钟的进程
38    url_format = gitproxy .. "https://github.com/%s.git",
39    -- lazy.nvim 需要 git >=2.19.0。如果你想在旧版本中使用 lazy,
40    -- 可以将下面设置为 false。这样应该可以工作,但不被支持并且会
41    -- 大幅增加下载量。
42    filter = true,
43    -- 网络相关 git 操作 (clone, fetch, checkout) 的频率
44    throttle = {
45      enabled = false, -- 默认不启用
46      -- 每5秒最多2个操作
47      rate = 2,
48      duration = 5 * 1000, -- 以毫秒为单位
49    },
50    -- 在为插件再次运行 fetch 之前等待的秒数。
51    -- 重复的更新/检查操作将不会再次运行,直到这个
52    -- 冷却期过去。
53    cooldown = 0,
54  },
55})
3. 主题
我喜欢gruvbox,这里使用ellisonleao/gruvbox.nvim,根据lazy.nvim structure plugins and lazy.nvim Installation
Any lua file in
~/.config/nvim/lua/plugins/*.luawill be automatically merged in the main plugin spec
~/.config/nvim/lua/config/lazy.lua 中的 spec 字段配置如下:
1require("lazy").setup({
2  spec = {
3    -- same as: require("lazy").setup("plugins")
4    -- 从 lua/plugins 目录加载插件配置
5    { import = "plugins" },
6  },
7})
~/.config/nvim/lua/plugins/gruvbox.lua 写入如下:
1return {
2    "ellisonleao/gruvbox.nvim",
3    priority = 1000,
4    config = function()
5        vim.cmd.colorscheme("gruvbox")
6    end,
7}
4. 选项配置
选项配置
主要用到的就是 vim.g、vim.opt、vim.cmd 等,我制造了一个快速参照对比的表格
In Vim | In nvim | Note |
|---|---|---|
let g:foo = bar | vim.g.foo = bar | |
set foo = bar | vim.opt.foo = bar | set foo = vim.opt.foo = true |
some_vimscript | vim.cmd(some_vimscript) |
按键配置
 1-- define common options
 2local opts = {
 3    noremap = true,      -- non-recursive
 4    silent = true,       -- do not show message
 5}
 6
 7-----------------
 8-- Normal mode --
 9-----------------
10
11-- Hint: see `:h vim.map.set()`
12-- Better window navigation
13vim.keymap.set('n', '<C-h>', '<C-w>h', opts)
14vim.keymap.set('n', '<C-j>', '<C-w>j', opts)
15vim.keymap.set('n', '<C-k>', '<C-w>k', opts)
16vim.keymap.set('n', '<C-l>', '<C-w>l', opts)
17
18-- Resize with arrows
19-- delta: 2 lines
20vim.keymap.set('n', '<C-Up>', ':resize -2<CR>', opts)
21vim.keymap.set('n', '<C-Down>', ':resize +2<CR>', opts)
22vim.keymap.set('n', '<C-Left>', ':vertical resize -2<CR>', opts)
23vim.keymap.set('n', '<C-Right>', ':vertical resize +2<CR>', opts)
24
25-----------------
26-- Visual mode --
27-----------------
28
29-- Hint: start visual mode with the same area as the previous area and the same mode
30vim.keymap.set('v', '<', '<gv', opts)
31vim.keymap.set('v', '>', '>gv', opts)
插件
lualine
lualine.nvim是一个状态栏插件
lua/plugins/lualine.lua
 1return {
 2    "nvim-lualine/lualine.nvim",
 3    dependencies = { "nvim-tree/nvim-web-devicons" },
 4    config = function()
 5        require("lualine").setup({
 6            options = {
 7                theme = "gruvbox",
 8            },
 9        })
10    end,
11}
配置
Comment.nvim 和 lang-cpp.lua
which-key.nvim
Create key bindings that stick. WhichKey helps you remember your Neovim keymaps, by showing available keybindings in a popup as you type.
简而言之就是我们可以使用这个插件,来提示我们软件的快捷键是什么?
具体使用参考which-key.nvim 使用,最佳实践:
1-- 在你的 plugins/gitsigns.lua 文件中
2return {
3 "lewis6991/gitsigns.nvim",
4 -- 其他配置...
5 keys = {
6 -- ↓↓↓ 这就是那个特殊的“显式分组条目” ↓↓↓
7 {
8 "<leader>g",
9 group = "Git", -- 子菜单的标题
10 desc = "Git (Gitsigns)", -- 在<leader>菜单中显示的描述
11 icon = "", -- Nerd Font 图标 (可选)
12 -- 注意: 这里没有第二个元素 (rhs 命令)
13 },
14
15 -- ↓↓↓ 下面是这个分组里的具体键位 ↓↓↓
16 { "<leader>gj", "<cmd>Gitsigns next_hunk<cr>", desc = "Next Hunk" },
17 { "<leader>gk", "<cmd>Gitsigns prev_hunk<cr>", desc = "Previous Hunk" },
18 { "<leader>gp", "<cmd>Gitsigns preview_hunk<cr>", desc = "Preview Hunk" },
19 { "<leader>gs", "<cmd>Gitsigns stage_hunk<cr>", desc = "Stage Hunk" },
20 { "<leader>gu", "<cmd>Gitsigns undo_stage_hunk<cr>", desc = "Undo Stage" },
21 { "<leader>gr", "<cmd>Gitsigns reset_hunk<cr>", desc = "Reset Hunk" },
22 },
23}
1. marks.nvim
文件内标记 (Marks)
mx设置标记 x (x 为任意字母 a-z)m,设置下一个可用的小写字母标记m;在当前行上切换标记 (如果当前行没有标记,则添加一个;如果有,则删除它)dmx删除标记 xdm-删除当前行上的所有标记dm<space>删除当前缓冲区(文件)中的所有标记m]跳转到下一个标记m[跳转到上一个标记
m: 预览标记。系统会提示您输入要预览的特定标记;如果直接按 回车键,则会预览下一个标记。
跨文件书签 (Bookmarks)
m[0-9]添加一个书签到书签组 [0-9] 中 (例如 m1 会在第1组添加一个书签)dm[0-9]删除书签组 [0-9] 中的所有书签m}跳转到下一个同类型的书签 (类型与光标下的书签相同)。此功能可跨缓冲区(文件)工作。m{跳转到上一个同类型的书签 (类型与光标下的书签相同)。此功能可跨缓冲区(文件)工作。dm=删除光标所在位置的书签
配合 whichkey.nvim的' or ` 使用,实现快速的跳转
2. lsp
从 Neovim v0.11 开始引入了 vim.lsp.config 和 vim.lsp.enable 这 2 个 API 对 LSP 进行配置,这下再也不用安装 nvim-lspconfig 了。但我们可能还是需要一个 LSP Registry 用来方便地下载 LSP,比如 mason.nvim(这里我选择手动下载clangd)
- 首先看一下 nvim官方lsp 文档
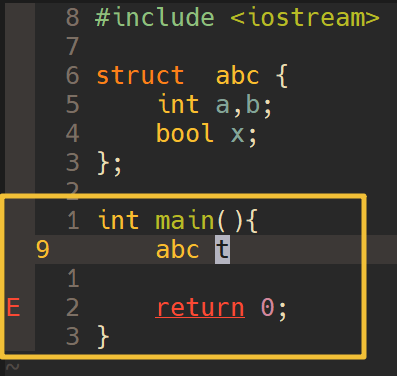
TODO 简单配置如下
实现功能: 实时错误显示
3. nvim-cmp
这里使用经典nvim-cmp